Cross-unders
Cross-under procedures move aircraft from the parade position on one side of the lead to the other for flight safety/training reasons.
Introduction
Introduction
- The purpose of a cross-under is to move the Wing from the parade position on one side of lead to the other
- Cross unders may be used to:
- Minimize Wing's exposure to sun
- Area management
- Breakup and rendezvous
- Returning to the airfield (overhead maneuver)
- The maneuver is performed slowly to control movement, and should be not be performed faster than a walking pace
- There are two methods to perform this maneuver, the box, and the V
Cross-under Mechanics
Cross-under Mechanics
- Throttles control nose-to-tail
- Nose controls step-down
- Angle of bank controls crossing rate
- All corrections should be "3 part power corrections"
Cross-under Procedure
Cross-under Procedure
- LEAD: Check the wingman is in position and the area is clear
- LEAD: Give the cross-under signal
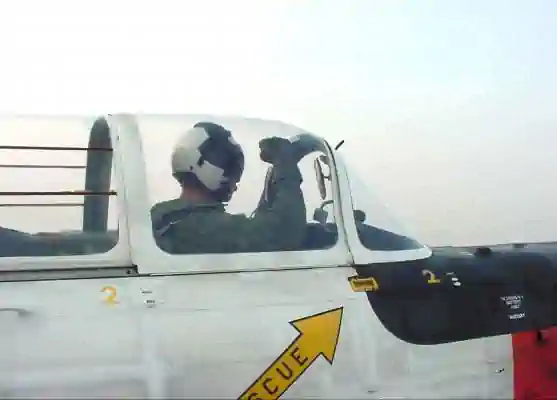
- The cross-under signal is a fist held vertically [Figure 1]
- WING: Acknowledge receipt of the signal with a head-nod
- WING: Simultaneously reduce the power slightly and pitch down to increase step-down
-
Perform the Step-down:
-
Box Method:
- Move straight back and down to achieve 10' of nose-to-tail and 15' of vertical separation
- If the horizontal stabilizer is swept, you will be looking roughly down the leading edge
- If the horizontal stabilizer is straight, you will be looking at the forward tip of the stabilizer moving toward the trailing edge of the wing
- Add power to stabilize in position
-
V-Method:
- Move back at an angle while descending to establish 10' of nose-to-tail and 15' of vertical separation, established in column behind lead
- Add power to stabilize in position
-
-
Perform the Cross-under:
-
Box Method:
- Simultaneously add power while increasing bank angle to move laterally to the same position, but on the other side of lead
- Wing must achieve a controlled move to the other side of lead without disturbing the nose-to-tail clearance
- Wings nose should never be under leads tail, EVER
- Project yourself outside of leads wingtip to avoid driving too close
- Add power to stabilize in the stepped-down position
- Visual cues will remain the same as on the other side of lead
-
V Method:
- N/A
-
-
Return to Parade Position:
-
Box Method:
- Simultaneously add power and increase pitch to maneuver back into parade position
-
V Method:
- Complete the other side of the V, simultaneously adding power and increasing pitch to move back into parade position
-
Cross-under Common Errors
Cross-under Common Errors
- Failure to observer/recognize the cross-under signal given by lead
- Excessive control inputs
- Not applying power early enough to prevent excessive drift aft of lead
Conclusion
Conclusion
- Remain mindful that performance calculations are usually more optimistic than actual performance
- Formation maneuvers are unfamiliar to most in general aviation, requiring in-depth preflight briefing, communication, and practice
- Do NOT treat these maneuvers haphazardly as the risk of mid-aid collision is clearly greater
- Maneuvers should always be practiced with an instructor experienced in formation flight before attempting
- Consider actual versus realized performance when doing any performance calculations
- Consider practicing maneuvers on a flight simulator to introduce yourself to maneuvers or knock off rust
- Still looking for something? Continue searching:
References
References
